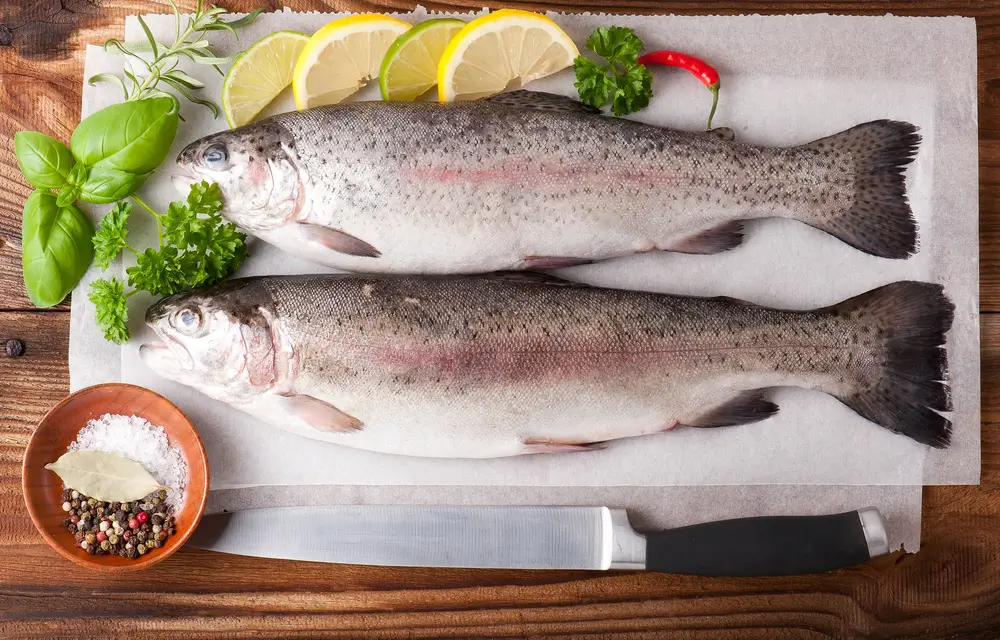
Do you like to go fishing? If so, you’re probably familiar with the process of bleeding a trout. This is an important step in the fishing process, and it’s one that many anglers don’t know how to bleed a trout properly.
In this blog post, we will walk you through the process of bleeding a trout step-by-step. We’ll also discuss why this step is important and how to get the most out of your catch.
Why is Bleeding a Trout Important?
Bleeding a trout is important because it helps preserve the meat and flavor of your catch. It also removes toxins from the body that can be harmful to humans if ingested.
For example, bacteria like E Coli are found in some types of fish but will die off once they’re exposed to oxygen (i.e., by bleeding the trout). So by bleeding your catch, you can minimize the risk of food poisoning.
How to Get the Most Out of Your Trout Catch
Bleeding a trout is just one step in the process of getting the most out of your catch. To make sure your trout tastes great, you’ll also need to clean it and cook it properly.
Bleeding a trout is just one step in the process of getting the most out of your catch. To make sure your trout tastes great, you’ll also need to clean it and cook it properly.
How to Bleed a Trout: Step by Step
If you’ve ever caught a trout, you know how important it is to bleed the fish as soon as possible. This prevents the fish from thrashing around and easier cleaning process.
In this guide, we’ll show you how to properly bleed a trout so that you can enjoy your fresh catch:
- Step One: Locate the gills on either side of the trout’s head.
- Step Two: Insert the blade of a sharp knife into one of the gills, and slice open the artery.
- Step Three: Hold onto the trout’s body to keep it still, and wait for it to bleed out.
- Step Four: Once the trout is fully bled out, you can prepare it for cooking.
Bleeding a trout is an important step in preparing it for cooking, as it removes contaminants and toxins from the body.
- By bleeding the trout properly, you can ensure that your meal is safe and delicious.
- For best results, you should bleed your trout as soon after it is caught as possible.
- Make sure to use a sharp knife when bleeding the trout, so that you don’t accidentally rip the artery apart.
- When in doubt about how to bleed a trout, ask for assistance from someone who knows how to do it properly.
- If you’re looking for a delicious and healthy trout dish, try bleeding it yourself and see how much of a difference it makes. You won’t be disappointed.
- Trout is a healthy and delicious protein source, and bleeding it properly will ensure that you get the most out of your meal.
Follow these simple steps to bleed a trout, and you’ll be able to enjoy this tasty dish any time you want.
What Tools Do You Need to Bleed a Trout?
The first thing you will need to bleed a trout is the proper tools. Below are the tools I use when bleeding.
Please note that some of these items might not be available in your kitchen or at local stores, so you may have to order them online from Amazon or eBay before proceeding with this how-to guide.
For starters…
- A sharp knife with a thin blade. I use the Shun Premier Santoku Knife, which comes with two types of blades, one for slicing and one for cutting through bone or gristle. It’s very easy to use because you can just flip it over when needed; how convenient.
- Tongs (for holding fish while cutting into its gills). I use the OXO Good Grips Fish Tongs. They work great, and they’re dishwasher safe.
- A cutting board (to hold fish while slicing into its gills). I recommend getting something like these Proteak Edge Grain Cutting Boards because they are made out of teak wood which is naturally antibacterial, meaning you don’t have to worry about bacteria growing on them after using them repeatedly.
- Ice (for keeping fish cool while bleeding it out). I recommend getting some sort of insulated container that will keep your ice frozen for hours or days at a time without having to refill with water every few minutes like how most cooler bags do. I use the Yeti Tundra 65 Cooler, which is perfect for this sort of thing.
- A container or bucket to place the fish in once it has been bled out (to keep it from flopping around). I use a five-gallon plastic pail that I got at Home Depot.
How to Hold the Trout So That You Can Bleed It Properly
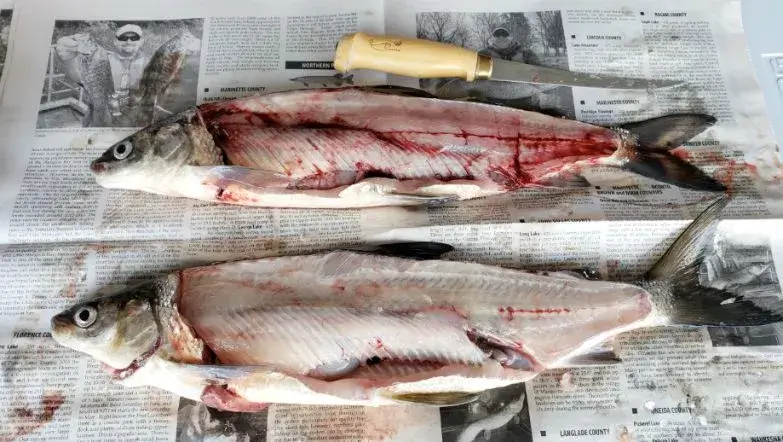
Hold the trout by its tail with your weak hand. If you are right-handed, use your left hand to hold it. Use your stronger (dominant) hand to cut its throat and bleed it out.
If you are right-handed, then hold the trout on a clean cutting board with its head pointing away from you so that when you cut its throat, the blood will flow away from you.
Cut the trout’s throat just behind its jawbone with a sharp knife. Ensure that you go deep enough to sever the jugular vein and carotid artery. You should see or feel a bump on each side of the fish’s neck where these two vessels are located.
Cut into this area with a slicing motion until you have completely severed both vessels.
If you are having trouble finding the jugular and carotid arteries, take a look at this diagram of a trout’s anatomy. The red lines indicate where you should cut to bleed the fish properly:
- Hold the trout by its tail with your weak hand
- Use your stronger (dominant) hand to cut its throat and bleed it out
- If you are right-handed, then hold the trout on a clean cutting board with its head pointing away from you so that when you cut its throat, the blood will flow away from you.
- With a sharp knife, cut the trout’s throat just behind its jawbone
- Make sure that you go deep enough to sever the jugular vein and carotid artery. You should see or feel a bump on each side of the fish’s neck where these two vessels are located
- Cut into this area with a slicing motion until you have completely severed both vessels
If necessary, cut through some flesh to reach them (but don’t cut too deeply).
The blood will immediately begin to drain from the fish. You may need to hold it by its head for a few moments to allow all of the blood time to come out.
You can tell when most of the blood has been drained because there will be no more red coming out, and you can see how clean the meat looks inside of the fish’s body cavity.
If you want to use a hose or other device to drain more blood from your trout, wait until all of this has happened first before attaching anything else. Otherwise, it will just be messy and ineffective.
After bleeding out your trout, remove its viscera and wash the meat inside and out with cold water. You’re now ready to cook it however you like.
The Best Way to Cut the Gills and Bleed
The best way to cut the gills and bleed the fish is to use a sharp, pointed knife. With the trout’s head facing away from you, insert the blade into the gill on one side of the fish and make a quick slicing motion towards the other side.
You should see blood start flowing immediately. Do this on both sides of the fish until it is bleeding freely.
– If you’re not good with knives, you can also use clippers or scissors. Just cut the gills and then let them bleed out. If there’s still blood in their body cavity after bleeding them, they’re not dead yet.
– You’ll want to do this as soon as possible to avoid killing your catch before it gets back into the water. Also, if you have a large fish (like salmon), it might be too big for your knife, and you’ll need to use clippers or scissors instead.
– If you don’t want any blood on the outside of your trout, just cut through its body cavity with a sharp knife, so there’s no bleeding at all.
– Finally, remember to take a picture of your catch before you release it back into the water.
How Long Does Bleeding a Trout Take?
Bleeding a trout is almost instantaneous; it will only take seconds before you have a completely bled trout. This makes bleeding the best method for removing blood from fish.
It does not cook out of the flesh like freezing does, so if you are concerned about how your fish taste, this could be an important factor for you to consider.
We don’t recommend doing this because it can be more time-consuming than bleeding a trout, but you could also freeze your fish.
Freezing fish is how many restaurants keep the blood out of their steaks and other cuts of meat without having to worry about how long they sit in the freezer before being cooked.
If you choose to do this, however, make sure to freeze your fish for a minimum of two hours.
Some people choose to gut their trout rather than bleed it. This is not as effective at getting the blood out of the fish, but it does work if you are in a hurry or do not have the proper tools to bleed a trout.
To get your fish, cut open the belly of the trout and remove all organs inside.
Tips for Keeping Your Trout Alive After Bleeding It
After your trout is properly bled, you should keep it alive for a few days to ensure that all the blood has been drained from its body.
The best way to keep trout alive after bleeding is by keeping them in an aerated tank or pond until they are ready for sale.
The most common mistake people make when keeping trout alive is overcrowding them in a small tank.
This will quickly deplete the oxygen levels in the water and cause the trout to suffocate. A good rule of thumb is to allow one gallon of water per inch of fish.
If you cannot provide an aerated tank or pond for your trout, you can also keep them in a cooler filled with ice. The cold water will help keep the trout alive until they are ready for sale or consumption.
Tips for keeping your trout alive after bleeding:
- Keep trout in an aerated tank or pond until they are ready for sale.
- Do not overcrowd trout in a small tank – allow one gallon of water per inch of fish.
- If you are not able to provide an aerated tank or pond, keep trout in a cooler filled with ice.
- Coldwater will help to keep the trout alive until they are ready for sale or consumption.
FAQs About How to Bleed a Trout:
What are the benefits of bleeding a trout?
The most important reason you should bleed your trout is that it helps improve the quality of its meat.
It can also determine how fresh the fish is and how long ago it died. This could come in handy when you’re planning on eating or cooking a whole fish (instead of filleting it).
How do I know how long ago the trout died?
If you bleed your trout and its gills are still red and moist, then that means death was recent. On the other hand, if they’re dry or grayish-brown already, then that’s a sign that death occurred hours ago.
Why can’t I use an ice bath to bleed my trout?
Bleeding a trout is one of the first steps in cleaning a fish, and many anglers skip this step by using an ice bath instead, especially if there are no visible signs of blood.
However, if you do so, the meat may be affected in a way that makes it less tasty or even dangerous to eat (in other words, fishy).
What happens if I bleed my trout for too long?
It would help if you did not worry about bleeding your trout too much because this will likely result in the death of the fish. However, as long as you’re quick about it, there’s no need to be concerned.
How do I go about bleeding a trout?
To bleed your trout, hold its head down and slice open its gills with a sharp knife. You can then either let it flop around on the ground or dunk it in a bucket of cold water to help the bleeding process. Once the trout is done bleeding, you can clean and cook it however you like.
Conclusion
When you’re done, take your knife and cut off the head of the trout. This is where most of the blood will be, so it’s important to get as much out as possible. You can then gut and clean the trout before cooking.
Bleeding a trout might seem like an unnecessary step, but it helps remove any residual blood from the fish and makes it taste better. Follow these simple steps, and you’ll be able to bleed a trout like a pro.
